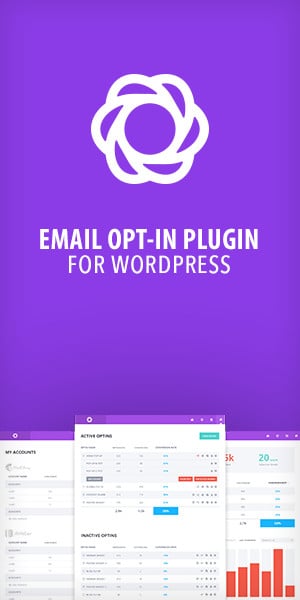
You’ve installed Divi on your WordPress site. You open the builder for the first time, and suddenly there are sections, rows, columns, modules, a purple dot at the bottom, multiple panels, and a whole lot of options staring back at you. If your first reaction was “where do I even start?”, you’re in good company.
Divi Builder is one of the most powerful visual page builders in the WordPress ecosystem, but like any powerful tool, it has a learning curve. The good news? Once you understand how it’s structured, building entire pages becomes surprisingly fast and intuitive. This guide walks you through everything from the ground up: how to launch the builder, what each building block does, how to use modules, how to customize your design, and how to go live, all with Divi 5’s updated interface in mind.
Whether you’re building your first personal blog or setting up a client website, this step-by-step walkthrough will give you a strong, confident foundation with the Divi Builder.
This guide covers Divi 5, officially released February 26, 2026. If you’re on Divi 4, most steps still apply, but the interface looks different. Upgrading to Divi 5 is free for all existing members.
What Is the Divi Builder?
The Divi Builder is the visual page builder that comes included with the Divi Theme and the Divi Builder plugin from Elegant Themes. It allows you to design WordPress pages and posts using a drag-and-drop interface, no coding required.
What makes it different from WordPress’s default Gutenberg editor is the level of visual control it provides. With Divi, you can see exactly what your page looks like as you build it, resize elements in real time, set different styles for desktop, tablet, and mobile independently, and create layouts that Gutenberg simply can’t match without a developer.
In 2026, with Divi 5 now officially released, the builder has been completely rebuilt from the ground up using a React-based architecture. This means it’s significantly faster, produces cleaner HTML output, has better performance scores, and introduces features like Complete Site Editing, all while keeping the same intuitive building structure that millions of users are already familiar with.
Visual Builder
- Front-end editing, see live changes
- Drag and drop directly on the page
- Click to select, click to edit
- Best for design work & layouts
- More visual, more intuitive
Backend Builder
- Works inside WordPress dashboard
- Faster loading, less resource-heavy
- Best for content editing & structure
- Shows a simplified builder view
- Good for quick text updates
For most design work, you’ll use the Visual Builder. This guide focuses primarily on that. The Backend Builder is there when you need a lighter editing experience, but the real power of Divi lives in the visual front-end view.
Before you can use the Divi Builder, you need to get Divi installed on your WordPress site. Here’s exactly how to do it.
First, purchase a Divi plan from Elegant Themes. You’ll choose between the Annual plan ($89/year) or the Lifetime plan ($249 one-time). Either gives you full access to the Divi Theme and the Divi Builder plugin. Once you’ve purchased, log into your Elegant Themes account and navigate to the Members area to download the Divi theme ZIP file.
- Log in to your Elegant Themes account, then go to Account, Downloads
- Download the Divi.zip file to your computer
- In your WordPress dashboard, go to Appearance → Themes → Add New
- Click “Upload Theme”, choose the Divi.zip file, and click Install Now
- After installation, click Activate to make Divi your active theme
- Go to Divi → Theme Options → General to enter your Elegant Themes API key (found in your account)
- This activates updates and support directly from your dashboard
Once activated, Divi adds a new “Divi” menu item to your WordPress sidebar and enables the builder on all pages and posts automatically. You’re ready to start building.
There are two ways to open the Divi Builder on any page or post.
Method 1: From the Frontend (Recommended)
Navigate to any existing page on your website while logged into WordPress. You’ll see a top admin bar, look for the option that says “Enable Visual Builder”. Click it. The page will reload and you’re now inside the Divi Visual Builder, where you can see your page exactly as visitors will see it, and edit it live.
Method 2: Creating a New Page
- In your WordPress dashboard, go to Pages → Add New
- Give your page a title (e.g., “Home” or “About Us”)
- Click the purple “Use Divi Builder” button that appears above the content editor
- The page will reload on the front end with the Visual Builder active
- You’ll see a prompt to choose how you’d like to start building
When you open the builder on a new blank page, Divi gives you three options to choose how to begin:
| Option | What It Does | Best For |
|---|---|---|
| Build From Scratch | Opens a blank canvas, you add everything manually | Custom layouts, learning the builder |
| Choose a Layout | Browse 2,000+ pre-designed layouts from Divi’s library | Fast project starts, inspiration |
| Clone Existing Page | Copies the structure of an existing page on your site | Creating similar pages quickly |
For this tutorial, select Build From Scratch. A single blank section will be added to your page automatically, and you’re ready to start building.
Before you start placing elements, you need to understand how Divi organizes everything on a page. This is the most important concept in the entire builder, get this right, and everything else clicks into place.
Divi uses a four-level hierarchy to structure every page:
Sections
Largest building block. Horizontal bands that stack vertically on the page. Think: Hero area, About section, Contact section.
Rows
Sit inside Sections. Define the column layout, 1 column, 2 columns, 3 columns, etc.
Columns
Sit inside Rows. Each column can hold one or more modules independently.
Modules
The actual content, text, images, buttons, videos, forms. These go inside columns.
Think of it this way: Sections are like the floors of a building. Rows are like rooms on each floor. Columns are dividers within a room. And Modules are the furniture inside. You can’t place furniture (modules) in a room that doesn’t exist, you need the structure first.
Types of Sections
Divi offers three section types that you’ll see when you add a new section:
- Regular Section, The most commonly used type. It has a default content width of 80% of the browser width and can hold standard rows and columns.
- Fullwidth Section, Stretches content edge-to-edge across the full browser width. Used for fullwidth sliders, fullwidth headers, or striking background visuals.
- Specialty Section, Allows more complex column arrangements, including a main content area with a narrower sidebar column, great for blog post layouts.
In Divi 5, sections are color-coded in the interface: blue outlines indicate sections, green outlines indicate rows. This makes it easier to select the right element when editing.
When you start from scratch, Divi adds one empty section to your page automatically. You’ll see a blue-outlined area with a green “+” icon in the center, that’s your row placeholder. Let’s build from here.
Adding a Row
Click the green “+” icon inside your section. A panel will pop up showing column layout options. You’ll see choices like:
- Single column (full width)
- Two equal columns (50/50)
- Three equal columns (33/33/33)
- Mixed widths (e.g., 1/4 + 3/4, or 2/3 + 1/3)
- Four columns, and more combinations
For a simple hero section, select the single column layout. Your row is now added and you’ll see a column placeholder ready for content.
Adding Another Section
To add more sections below, scroll to the bottom of your page and click the blue “+” button that appears between sections or at the very bottom. You can choose Regular, Fullwidth, or Specialty. For most layouts, you’ll add Regular sections for each new content area, your about section, your services section, your call-to-action, and so on.
Section Settings
Click the gear icon on any section to open its settings. Here you can set a background color, a background image, control padding and margin, add a parallax effect, or apply a gradient. These settings are what make each section visually distinct from the others on your page.
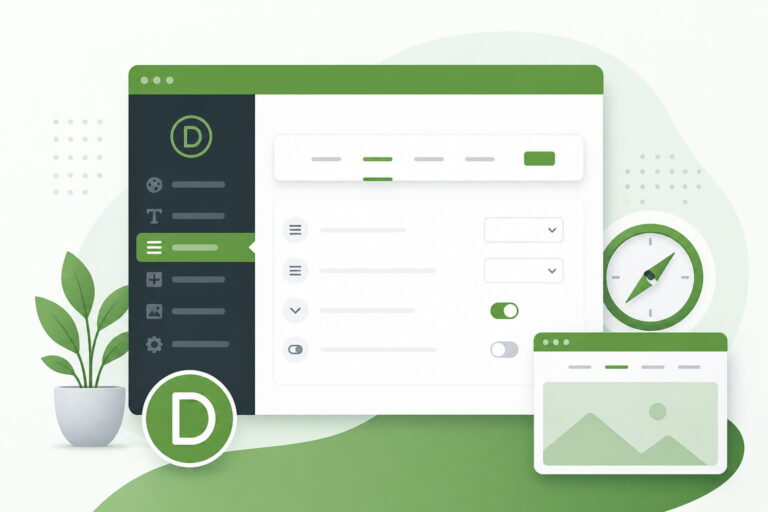
Modules are the actual content blocks that go inside your columns. Divi 5 includes 46+ modules covering everything from basic text and images to sliders, forms, WooCommerce products, pricing tables, and more. This is where the real design work happens.
Adding a Module
Click the grey “+” icon inside any column. A module chooser panel will appear. You can either scroll through the list or type in the search bar to find the module you need. Click any module to add it to the column, and its settings panel will open immediately.
The Most-Used Modules for Beginners
The Three Settings Tabs Inside Every Module
When you open any module’s settings, you’ll see three main tabs. Understanding what lives in each tab is key to working efficiently in Divi:
| Tab | What You’ll Find |
|---|---|
| Content Tab | The actual content, your text, images, links, video URLs, form fields, etc. Start here when you first add a module. This is where the “what” lives. |
| Design Tab | Visual styling options, font size, colors, spacing, borders, animations, box shadow, image sizing. This is where the “how it looks” lives. Most customization happens here. |
| Advanced Tab | Custom CSS classes and IDs, custom CSS input, visibility settings (show/hide on specific devices), and other technical settings. Beginners can safely ignore most of this tab initially. |
Editing Modules Inline
One of Divi’s best features is inline text editing. Click directly on any Text Module or heading on the page, the text becomes editable right there without opening a separate settings panel. Type your content, format it, change heading levels, and click away when done. In Divi 5, inline editing is significantly improved over Divi 4 and is now one of the most reliable ways to work with text content.
Duplicating and Deleting Modules
Hover over any module to see its control bar appear at the top. You’ll find icons to edit (pencil), duplicate (copy), disable (eye), and delete (trash). Duplicating a module is particularly useful when you have a styled element you want to reuse with different content, for example, a styled service card that you want to repeat three times in a row.
Getting the structure right is step one. Making it look like your brand is step two. Divi gives you complete control over every design element, but knowing where to set what will save you a lot of time.
Global Colors and Fonts (Set These First)
Before styling individual modules, the smartest move is to set your global colors and typography. This ensures consistency across your entire site and means you won’t have to manually apply the same font or color over and over.
- Go to Divi → Theme Customizer in your WordPress dashboard
- Under General Settings → Typography, set your body font, heading font, and default text sizes
- Under General Settings → Layout, set your content width and section defaults
- In the Visual Builder, click the hamburger icon in the top bar → Theme Customizer to access it from inside the builder
In Divi 5, a new Global Design Tokens system has been introduced. This means colors, typography, and spacing defined globally apply consistently across all modules, fixing a major inconsistency issue that existed in Divi 4. When you update a global color, every element using that color updates automatically across your entire site.
Styling Within Modules
Inside every module’s Design tab, you’ll find granular control over typography, colors, spacing, borders, and effects. Here’s what’s available for a typical Text Module:
- Text Settings, font family, font weight, font size, line height, letter spacing, text alignment, text color
- Heading Settings, separate controls for H1 through H6 within the module
- Background, background color, gradient, image, or video
- Spacing, margin and padding for all four sides, with responsive overrides per device
- Border, border width, style, color, and individual corner border radius
- Box Shadow, pre-set shadow options or custom shadow settings
- Animation, entrance animations with direction, speed, and delay controls
Using the Composable Settings (Divi 5.1+)
A powerful new feature introduced in Divi 5.1 is Composable Settings. This allows you to unlock design options for any sub-element of a module, even options that weren’t available for that element before. For example, you can now add sizing options to a button inside a CTA module, or animation settings to an icon within a Blurb module. In Divi 4, you’d need custom CSS to fill these gaps. In Divi 5, it’s all available through the UI.
Design Tips for Beginners
- Stick to 2–3 colors max on your site. Use a primary brand color, a neutral, and one accent.
- Use consistent padding, 60px top/bottom on sections is a common starting point.
- Set a max-width for your row content (800–1100px) to keep text readable on large screens.
- Use Divi’s Global Colors feature (Design tab → Color picker → “+” button) to save your brand colors for reuse.
- Don’t add animations to every element. Use them sparingly for calls-to-action and key highlights.
In 2026, mobile-first design isn’t optional, it’s mandatory. Google uses mobile-first indexing, meaning your site’s mobile version determines your search rankings. Divi Builder gives you complete responsive control without writing a single line of CSS.
Switching Between Device Views
At the bottom center of the Visual Builder, you’ll see the purple dot (the main settings button). To the left of it are device icons, desktop, tablet, and phone. Click any icon to switch your preview to that device size and start editing for that specific breakpoint.
In Divi 5, the responsive system has been completely overhauled. You now have seven predefined responsive breakpoints covering all device types, and each breakpoint has fully independent, predictable controls. What you set on desktop doesn’t automatically override tablet or mobile settings, Divi uses sensible inheritance but gives you explicit overrides.
Per-Device Settings
Almost every design setting in Divi can be set differently per device. You’ll notice small device icons next to many settings in the Design tab. Click the phone or tablet icon next to any setting to set a device-specific value. Common per-device customizations include:
- Reducing font sizes on mobile (e.g., a 52px headline becomes 30px on phone)
- Stacking columns on mobile that appear side-by-side on desktop
- Hiding elements on specific devices (show on desktop, hide on mobile)
- Adjusting section padding so content doesn’t feel cramped on small screens
- Changing text alignment (centered on mobile, left-aligned on desktop)
Column Stacking Behavior
By default, Divi stacks multi-column rows vertically on mobile devices. A two-column row becomes two full-width stacked blocks. A three-column row becomes three stacked blocks. This is usually the correct behavior. However, if you need columns to stay side-by-side on mobile, you can disable column stacking in the Row settings under the Design tab → Layout. Use this carefully, it works well for icon + text combinations where both elements are compact, but can cause readability issues for longer content.
Building from scratch is a great learning exercise, but for real projects with deadlines, Divi’s Layout Library is one of its most valuable features. Instead of building every element from zero, you start with a professional design and customize it to match your brand.
Divi includes over 2,000 pre-made page layouts organized into website packs. Each website pack typically includes a homepage, about page, services page, contact page, blog layout, and often several more, all visually consistent with each other. In 2026, new layouts are still being added regularly.
How to Load a Layout
- Open the Visual Builder on any new blank page
- Click the purple circle (main settings button) at the bottom center
- Click the “+” icon to open the Layout Library
- Browse by category or search for a layout type (e.g., “restaurant”, “portfolio”, “law firm”)
- Click Use This Layout, Divi loads the entire design onto your page
- Edit the text, swap out images, and adjust colors to match your brand
Divi AI for Layout Generation (Pro Feature)
If you have Divi Pro, you get access to Divi AI, which takes layouts to the next level. You can describe your business in a text prompt, and Divi AI will generate a custom page layout complete with placeholder content, images, and a structure tailored to your description. As of Divi 5.2, AI Agents have been introduced that take this further, a chat-based assistant that helps you build and modify your site through guided conversations. This is currently a Divi Pro feature and not included in the standard Annual or Lifetime plans.
Once your page looks the way you want, it’s time to save your work and take it live. This part is straightforward, but there are a few important things to know about how Divi handles saving.
Saving Your Work
Click the purple circle at the bottom center of the screen. This opens the main settings bar. You’ll see several icons, the checkmark/save icon saves your work. Divi also auto-saves periodically in the background, but it’s good practice to manually save before exiting.
You can also save sections, rows, or individual modules to the Divi Library for reuse on other pages. This is one of Divi’s most powerful workflow features, design a header section once, save it to the library, and load it on any page across your site. If you have Divi Cloud, these saved layouts sync across all your websites.
Publishing Your Page
- Click the purple circle → then click Exit Visual Builder
- This returns you to the standard WordPress editor view
- Click the blue Publish button (or Update if the page already exists)
- Your page is now live on your website
Saving to the Divi Library
Hover over any section, row, or module and click the save icon (bookmark icon) in the element’s control bar. Give it a name and save it to your library. Next time you’re on any page, you can open the Layout Library, click “Your Saved Layouts” or “Your Saved Sections” and load it with one click. This is a massive time-saver for freelancers and agencies who reuse design elements across client sites.
So far, everything we’ve covered is about building individual pages. But Divi has a second, even more powerful layer: the Theme Builder. This is where you design the elements that appear across your entire website, not just on one page.
The Theme Builder lets you create custom templates for:
- Global header (appears on every page of your site)
- Global footer (appears on every page of your site)
- Single blog post template (how every blog post looks)
- Blog archive/category pages
- Custom 404 error page
- WooCommerce product page templates
- Custom templates for any post type or condition you define
How to Access the Theme Builder
Go to Divi → Theme Builder in your WordPress dashboard. You’ll see a visual overview of your site templates. Click “Add Global Header” to start designing your site’s header, logo, navigation menu, any top bar elements. Click “Add Global Footer” to design your footer.
Complete Site Editing in Divi 5.1
One of the biggest new features in Divi 5.1 (released March 2026) is Complete Site Editing. Previously, you’d design your header in one place, your footer in another, and your page body in yet another. With Complete Site Editing, you can now edit your header, footer, and body content all at once from a single unified view. Your entire site, top to bottom, editable in one session. This is a significant workflow upgrade that Divi 4 users will immediately appreciate.
Pro Tips for Divi Beginners in 2026
These are the things experienced Divi designers know that beginners usually figure out the hard way. Skip the learning curve with these tips:
Workflow & Speed Tips
- Learn keyboard shortcuts. Press Z to undo, Ctrl+F to find an element, and Ctrl+Shift+S to save. Open the Divi Helper (question mark icon in the top bar) to see all shortcuts.
- Use the Layers Panel. When your page has many elements, the Layers Panel (icon in the top bar) shows the full structure as a tree, click any item to select it directly. Much faster than trying to click elements on a complex page.
- Wireframe Mode. When editing structure, switch to Wireframe Mode (purple circle → view options). It strips all styling and shows just the layout skeleton, makes it much easier to rearrange elements.
- Right-click for context menu. Right-clicking on any section, row, or module shows a context menu with quick actions, duplicate, copy styles, paste styles, and more. This is one of the fastest ways to work.
- Copy and paste styles. Design one module, right-click → Copy Module Styles. Then right-click any other module → Paste Module Styles. Instant style cloning without redoing every setting manually.
Design Quality Tips
- Use consistent spacing. Set all sections to the same top/bottom padding (60–80px) unless you intentionally want one to feel different. Inconsistent spacing is the number-one thing that makes beginner sites look amateurish.
- Compress your images before upload. Divi Builder is fast, but heavy images slow down any page. Use WebP format and run images through a compressor like Squoosh or Imagify before uploading to WordPress.
- Don’t use more than 2 typefaces. Choose one font for headings and one for body text. Divi has Google Fonts built in, pick two complementary options and apply them globally.
- Test on a real phone, not just the browser preview. Browser device emulation is helpful but imperfect. Always check your final page on an actual mobile device before going live.
- Save your work to the Divi Library early. The moment you have a section you like, save it. If you accidentally delete or overwrite something, your saved library version is your backup.
One more thing worth mentioning: Divi Builder has a full undo history. You can undo multiple steps by pressing Ctrl+Z (or Cmd+Z on Mac) or by accessing the undo history from the builder controls. Don’t be afraid to experiment, you can always go back.
Frequently Asked Questions
Is Divi Builder beginner-friendly?
Yes, with a caveat. Divi has a slight learning curve compared to simpler drag-and-drop builders, but it’s very approachable. The section/row/column/module structure makes logical sense once you get it. Most beginners are comfortably building pages within a few hours of their first session. The Layout Library also shortens the learning curve significantly since you start with a working design rather than a blank page.
Do I need coding knowledge to use Divi?
No. Divi Builder is designed to be used without any coding. For the vast majority of design tasks, every option you need is available through the visual interface. That said, Divi does have a Custom CSS field in every element’s Advanced tab, and the Theme Builder supports custom code snippets, these are there for when you want to go beyond the built-in options, but they’re completely optional.
What’s the difference between Divi Theme and Divi Builder Plugin?
The Divi Theme is a complete WordPress theme that includes the builder, a Theme Builder for headers/footers, and a full set of theme-level design controls. The Divi Builder Plugin is just the page builder component, designed to work with any third-party theme. Both are included with a Divi membership, you choose which one to install based on whether you want Divi’s own theme or prefer to use a different theme framework.
Can I use Divi with WooCommerce?
Absolutely. Divi has deep WooCommerce integration. You can design custom product page templates, shop archive pages, cart and checkout pages, and use dedicated Divi WooCommerce modules (Add to Cart, Product Image, Product Tabs, etc.) all through the visual builder. It’s one of the most flexible setups for building a custom WooCommerce store without developer help.
Does Divi Builder work with Divi 5?
The Divi Builder is Divi 5, it’s the same product. Divi 5 was officially released on February 26, 2026, and it’s a complete rewrite of the builder with a new React-based engine. All existing Divi members can upgrade to Divi 5 for free. If you’re starting fresh, you’re automatically on Divi 5.
How do I undo changes in the Divi Builder?
Use Ctrl+Z (Windows) or Cmd+Z (Mac) to undo steps. You can undo multiple times to go back through your edit history. The undo history is kept for the current builder session but is cleared when you exit the builder, so make sure to save a version to the Divi Library if you want to keep a particular state as a checkpoint.
Ready to Start Building with Divi?
Get access to the full Divi Builder, 2000+ layouts, unlimited website usage, and Divi 5, with a 30-day money-back guarantee on every plan.
Get Divi Lifetime, $249 Try Annual Plan, $89/yr